CDL Coupling and Uncoupling in 2026: Fifth-Wheel Checks and a Safe Sequence
Learn a repeatable Class A coupling and uncoupling sequence, including trailer height, fifth-wheel lock checks, tug tests, air lines, landing gear, and final inspection.
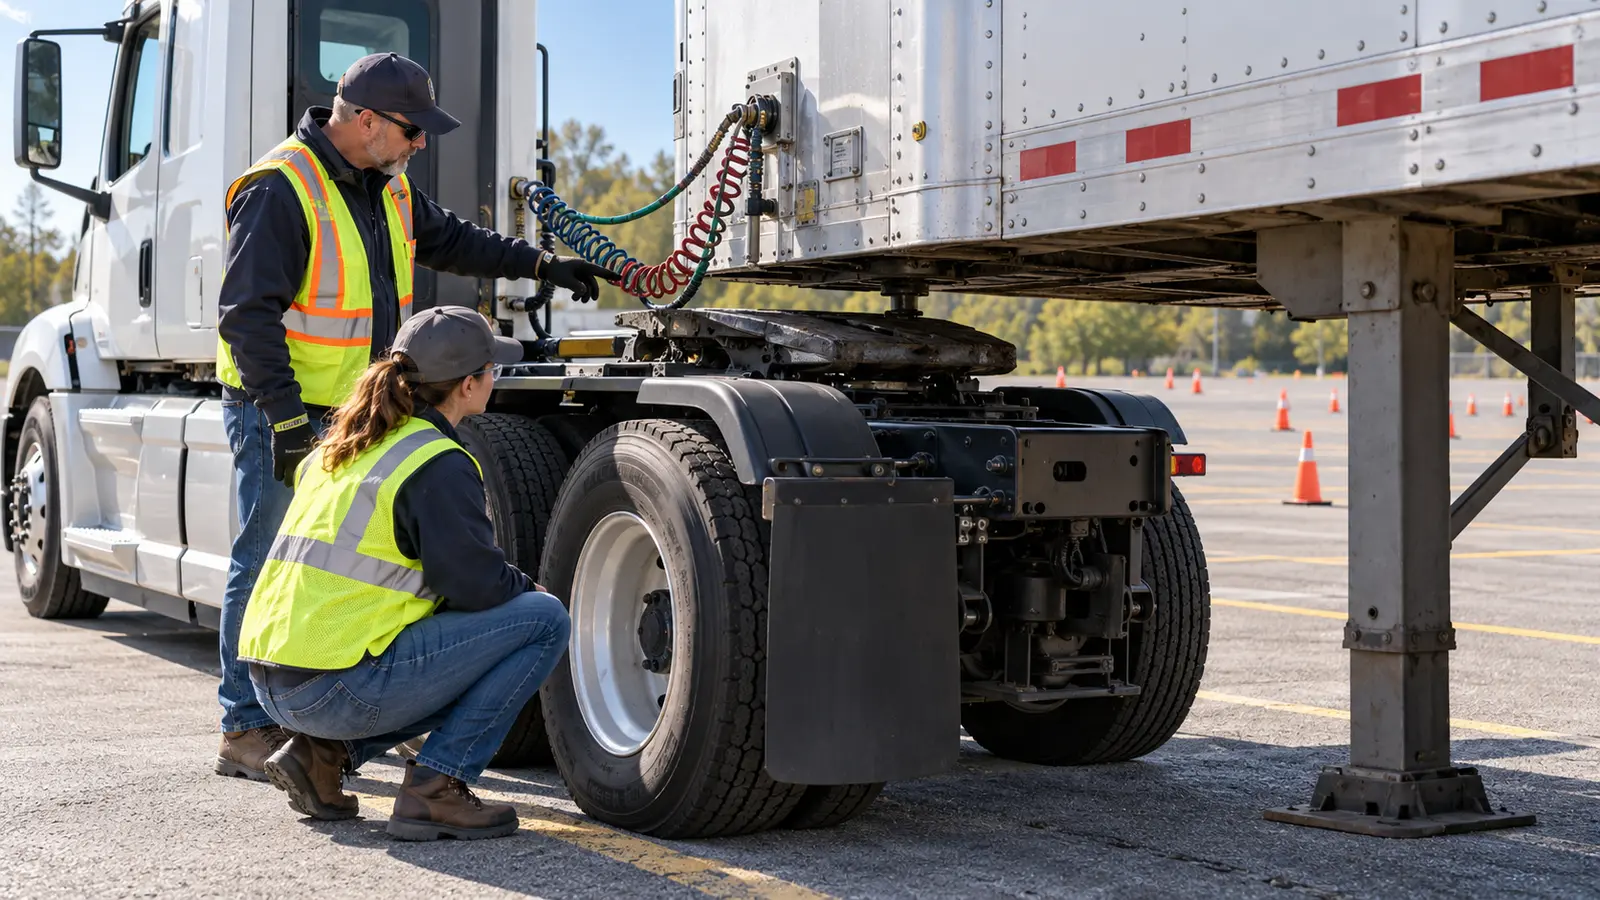
Coupling a tractor to a semitrailer is not one backward movement followed by a quick glance. It is a controlled sequence that combines vehicle positioning, trailer-height judgment, fifth-wheel inspection, air and electrical connections, a physical lock check, and a final walkaround. Skipping one step can damage equipment or leave the trailer insecure.
Federal Entry-Level Driver Training requires Class A trainees to learn safe coupling and uncoupling in theory and demonstrate proficiency on the range. The exact controls, landing-gear design, fifth-wheel release, and company procedure can vary, so use this guide as a study framework and perform the maneuver only under qualified supervision in equipment you have been trained to use.
Know what ELDT requires
Appendix A to 49 CFR Part 380 includes coupling and uncoupling in the Class A theory curriculum. It also places coupling, inspection, and uncoupling in the behind-the-wheel range curriculum, where the instructor must document proficiency. There is no federal minimum number of practice hours; completion depends on covering the required material and demonstrating the skill.
That distinction matters. Watching a video or passing an online theory assessment builds knowledge, but it does not replace range instruction. A trainee must work with a registered behind-the-wheel provider and show that the sequence can be completed safely and consistently in a Class A combination vehicle.
Start with the area, tractor, and trailer
Before moving, inspect the coupling area for people, obstructions, uneven ground, damaged components, and enough clearance to align the tractor. Confirm that the trailer is secured against movement according to the equipment and training procedure. Check that cargo or trailer condition will not create an unexpected shift while the unit is being connected.
Inspect the fifth wheel for damage, missing parts, improper tilt, debris, and adequate lubrication. The locking jaws should be open when preparing to couple. Look at the trailer kingpin and apron for bending, cracks, or other damage. Never crawl beneath an unsupported trailer or place yourself between vehicles that could move.
Set the correct trailer height before backing under
A common error is approaching a trailer that is too high or too low. The trailer should be positioned so the tractor frame or fifth wheel makes proper contact with the trailer apron and lifts the trailer slightly as the tractor backs under, following the method taught for that equipment. If the trailer is too high, the kingpin can pass over the fifth wheel without locking. If it is too low, the tractor can strike or damage the trailer.
Stop, secure the tractor, and get out to verify alignment and height before the final approach. Small landing-gear adjustments are safer than trying to force a bad setup. Use both mirrors while backing slowly, keep the tractor centered with the kingpin, and stop immediately if the trailer shifts or the approach no longer looks square.
Couple slowly and confirm the lock
Back beneath the trailer at idle or the slowest controlled speed until the kingpin enters the fifth wheel and the unit couples. Avoid striking the trailer with speed. After the connection is made, secure the tractor as instructed and perform a gentle tug test against the trailer brakes to check that the connection resists separation. A tug test is an early check, not the final proof of a proper lock.
Get out and inspect the connection from a safe position. Confirm that there is no visible gap between the upper and lower fifth-wheel surfaces, the locking jaws are fully closed around the shank of the kingpin, and the release arm is in its locked position. Do not accept a lock around the kingpin head, a partially closed jaw, or a visual check made only from one convenient angle.
Connect air and electrical lines correctly
Connect the service and emergency air lines to the correct glad hands and attach the electrical cable securely. Check seals, hoses, cables, and connectors for damage. Route the lines with enough slack for turns but not so much that they rub, snag, drag, or become pinched between the tractor and trailer.
Open the trailer air-supply control as appropriate, listen for leaks, and charge the trailer system. Test trailer lights and required brake functions using the procedure taught by the instructor or carrier. The connection is not ready for travel simply because the tractor can pull the trailer; the air, electrical, brake, and lighting systems must work as intended.
Raise the landing gear and complete the walkaround
Raise the landing gear fully using the correct gear range, secure the crank handle, and verify adequate road clearance. Remove wheel chocks only when the sequence and site procedure call for it. Check that storage doors, steps, and accessories are secured and that nothing remains beneath or beside the trailer.
Finish with a complete combination-vehicle inspection. Recheck the fifth-wheel mounting, locking mechanism, kingpin area, air and electrical lines, landing gear, trailer brakes, lights, tires, and clearance between the tractor and trailer. Federal rules require fifth-wheel assemblies to have a locking mechanism that prevents separation unless a positive manual release is activated; a driver should never assume that automatic engagement means the lock is correct.
Uncoupling begins with a stable parking location
Choose firm, level ground capable of supporting the landing gear and trailer. Position the combination straight when practical, apply the parking brakes, and secure the trailer against movement according to the equipment and company procedure. Soft ground, slopes, traffic, overhead hazards, or a poorly positioned trailer can turn an ordinary drop into a recovery problem.
Lower the landing gear until it makes firm contact with the ground, then use the approved amount of additional support. Do not lift the trailer excessively off the fifth wheel unless the equipment procedure directs it. Disconnect and secure the air and electrical lines so they cannot be crushed or contaminated. Release the fifth-wheel lock only after the trailer is supported and secured.
Pull out in stages instead of rushing
After releasing the fifth wheel, pull the tractor forward slowly until it is partly clear while the tractor frame remains available to catch the trailer if the landing gear settles. Stop, secure the tractor, and verify that the trailer is stable and the kingpin has cleared correctly. Then pull fully clear when the area is safe.
A staged exit gives the driver a chance to catch a height problem, weak surface, landing-gear issue, or trailer movement before the tractor is gone. Once clear, inspect the parked trailer, close or secure connectors as required, and make sure the unit is positioned where it will not create a traffic or loading hazard.
Avoid shortcuts that create coupling failures
Do not rely on sound alone, a tug test alone, or the assumption that another driver left the trailer at the correct height. Never skip the direct visual lock inspection, back aggressively to overcome misalignment, or stand between vehicles while either could move. If the jaws do not close, stop and reset the equipment instead of repeatedly striking the kingpin.
Other warning signs include a visible gap at the fifth wheel, a release handle that does not return, damaged glad-hand seals, crossed air lines, dragging cables, landing gear left partly down, and chocks forgotten at the wheels. Treat any uncertainty as a reason to stop, secure the equipment, and ask a qualified instructor or mechanic—not as pressure to depart.
Practice a repeatable spoken checklist
During training, say each step and the reason for it: area clear, trailer secured, components sound, height correct, alignment centered, low-speed contact, tug test, jaws locked around the kingpin shank, no gap, release arm locked, lines connected and protected, landing gear raised, lights and brakes checked. Speaking the sequence helps an instructor identify what the trainee understands and what is only habit.
Practice with the exact tractor and trailer configurations available at the school, but learn principles rather than one set of memorized reference points. Sliding fifth wheels, different trailer heights, alternate release mechanisms, air-suspension controls, and company policies can change the details. The safe routine is to inspect, verify, and adapt without skipping the required checks.
Build Class A knowledge before range practice
CDL Compass Class A ELDT theory explains the combination-vehicle systems, inspections, air brakes, and operating principles that support safe hands-on training. After theory completion, continue with a registered Class A behind-the-wheel provider for supervised range and public-road instruction. Applicants pursuing heavy straight trucks or buses instead can compare the Class B ELDT pathway, which does not include tractor-semitrailer coupling as a Class B range skill.
The goal is not merely to complete the maneuver once. A professional driver must be able to connect and separate equipment without endangering people, damaging components, or leaving an insecure combination. Slow movement, physical verification, and a consistent sequence are the habits that make coupling dependable.